
I figured it was about time for me to detail my home automation setup somewhere. It has gone through a bunch of iterations and grown to a point where I’m comfortable doing so. v1 of this started on a single Raspberry PI and has evolved into a cluster of NUCs backed by kubernetes and spanning a smattering of differences services and tooling.
Requirements
Offlinability
From day one, a main requirement for my home automation setup has been a strong ‘offlinability’. A good deal of the IOT consumer hardware out there documented have dependencies (hidden or not) in cloud based services. While this is fine for some devices, critical devices for me like alarm/cctv need to operate without an internet connection present. This negates using any cloud providers for the core instances themselves.
Replaceability
I need this thing to be relatively quiet, cheap to run, cheap to replace and scale, etc.
IACified
This thing needs to be as codified as possible, preferably in a git repo. I want to have this thing set up with all the available tooling to handle testing, deployment of changes as well and observability as needed.
Software
I had already decided this thing was going to live in the form of a kubernetes cluster. With most (if not all) of my required applications available already in the form of containers, it would be relatively easy to tie things together, not to mention the learning opportunities.
Hardware
I did a good amount of digging on this front, initially attempting to use a cluster of Raspberry Pi 4s. While this worked, it didn’t meet the resource needs for the applications I wanted to play with. In the end, I managed to procure a slab o’ NUCs on eBay from a defunct startup. This was outdated hardware but ~$300 got me 10x 6th gen Intel NUCs and 5x NVidia TK1s. These things were and needed to be added with memory/disk but ideal for this purpose. Interestingly, what was shipped to me more or less worked out of the box. The slab came with a simple 16 port gigabit switch and power supply for all involved too.
I dropped 4x of the TK1 units as they were unnecessary right now (left one behind for testing purposes). I also added a Raspberry PI that was going to act as my first pass at PXE OS provisioning for these devices. For this first pass too, I loaded each NUC up with 8GB ram and a 32GB USB stick. Definitely not ideal but got me up and running.
Problem 1: KVM
One interesting problem to solve was remote control. These are consumer grade devices, too old to support something like Intel AMT/vPro. Ideally, we would have a quick way to interact with these nodes remotely if needed. I know we won’t get anything near enterprise grade manageability, but something. Enter Pi-KVM.
As the name suggest, a Raspberry Pi that acts a KVM, emulating USB devices like input, storage and providing HDMI input. Here’s my first pass of this.

As you can see, I opted for a Raspberry Pi Zero W for the low power/smaller form factor at a sacrifice to FPS (I’m not going to be gaming over this thing!). I’m not going to go into the build of this thing as their site covers that. Coupled with a cheap 8 Port HDMI/USB KVM and assuming we can wrangle control of the KVM from the PI too, we have something. It’s a bit of a WIP and probably deserves a post in itself at some point when I deem it worthy.
Problem 2: OS Provisioning
We need to reliably provision/re-provision an OS to these as needed and in a ‘Codified’ way. Obviously, PXE booting make sense for thse, since they support LAN Boot. In the end, I opted for something cheap and cheerful. Enter netboot. This tool is very easy to use and allows you to easily define profiles for your hosts. My home setup uses unifi hardware and allowed me to easily define a subnet with the required DHCP configuration to PXE provision the OS.
I was able to quickly deploy an OS to the 32GB USB sticks on these nodes and tired kicked a very basic kubernetes cluster deployment to these nodes using Kubespray. On to productionifying it!
Stack not Slab
The layout of these boards likely made sense for the original deployment as a slab in a in rack but nowhere near the spacing I was allowing for this thing. At a max, I want this on a single shelf in a 12 U rack. I was alloting ~3U for this. I went about quickly separating these NUCs from the slab and started into figuring out layout.
Problem 3/4: Layout & Storage
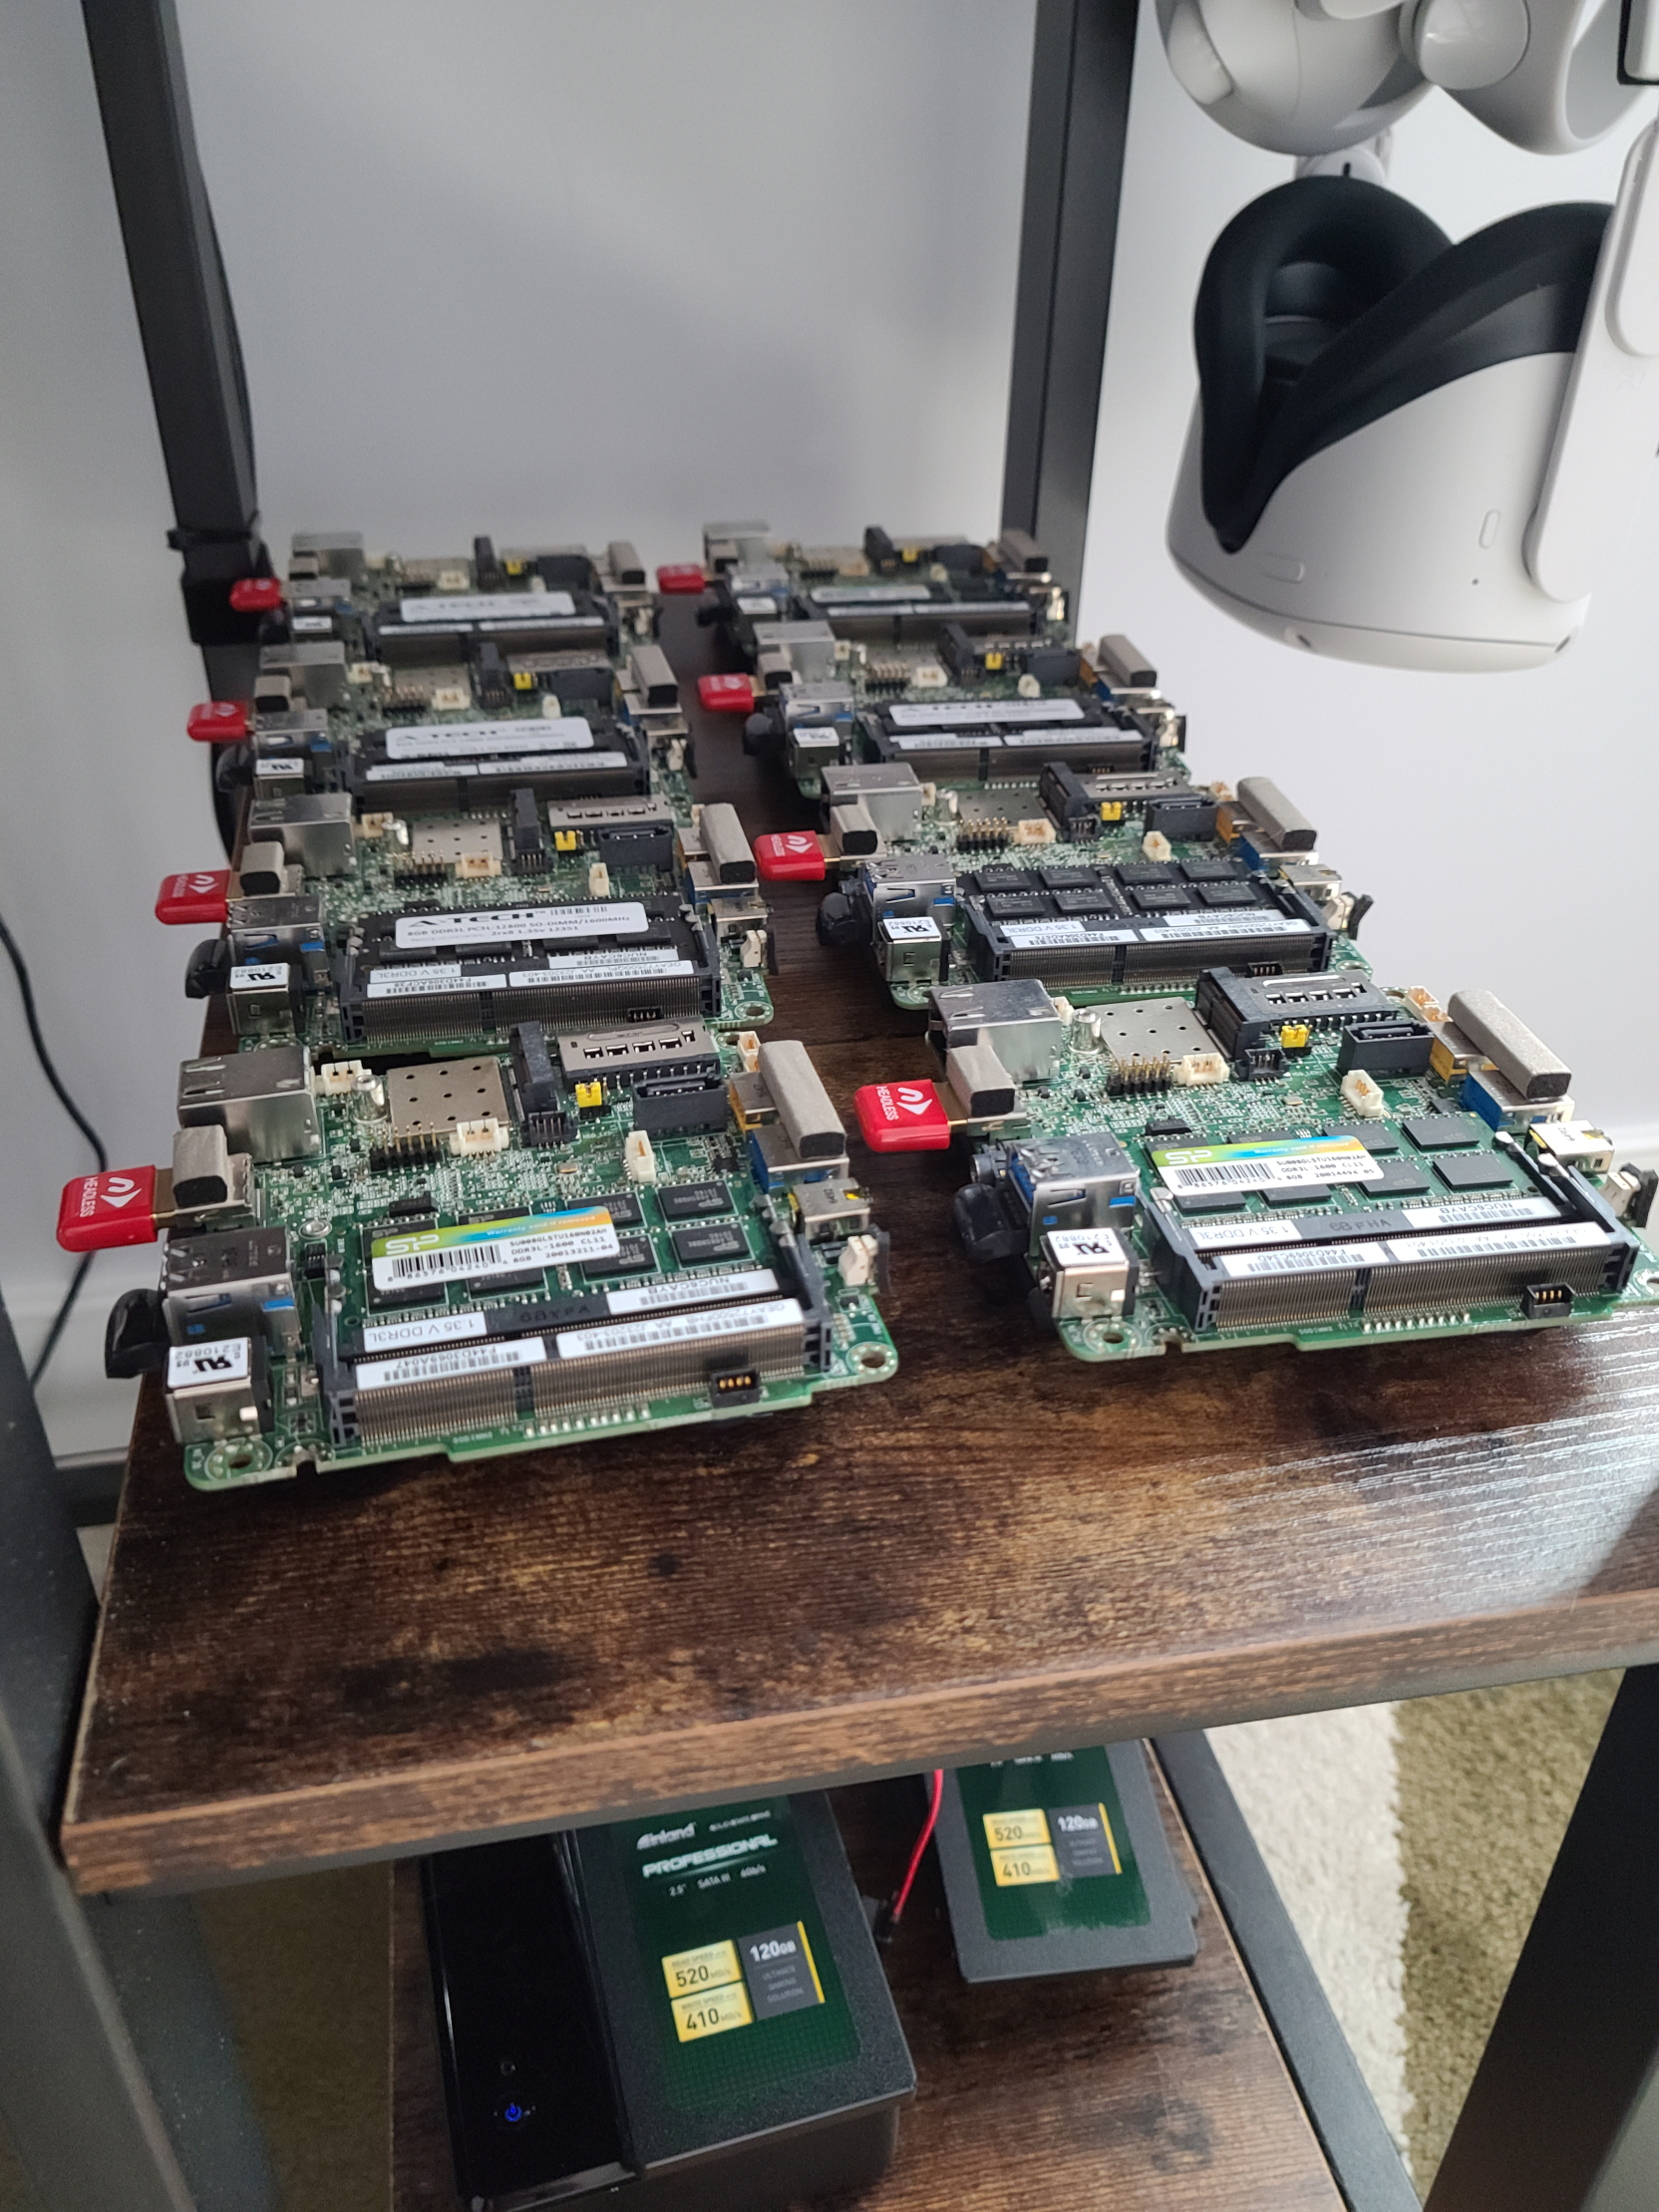
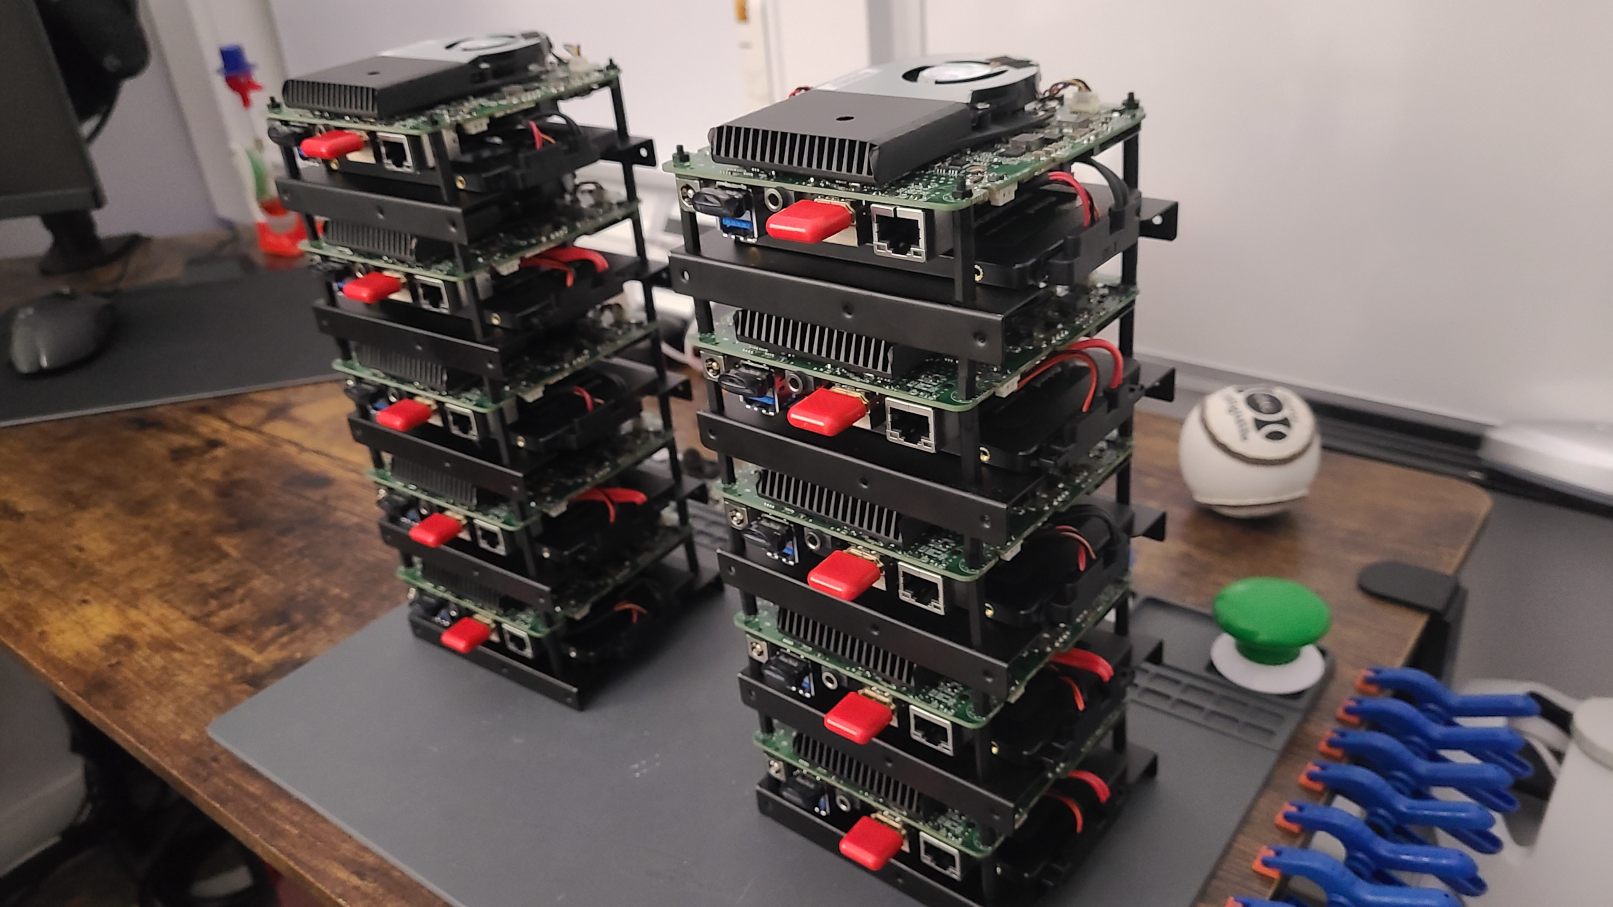
Loosely, I knew I was going to use some form of distributed Storage on these nodes for persisted things backed by my Synology NAS for backups, etc. This meant that we needed encorporate larger disks in this setup, 32GB USB wasn’t going to cut it. These NUCs had a single SATA connection available but thats about it. Not to mention the the fact that I only had the PCB, no housing to mount these disks. In the end I bought a gaggle of cheap 120GB SSDs, some 3.5 inch brackets and a smattering of riser screws. Then went to town on figuring out layout.
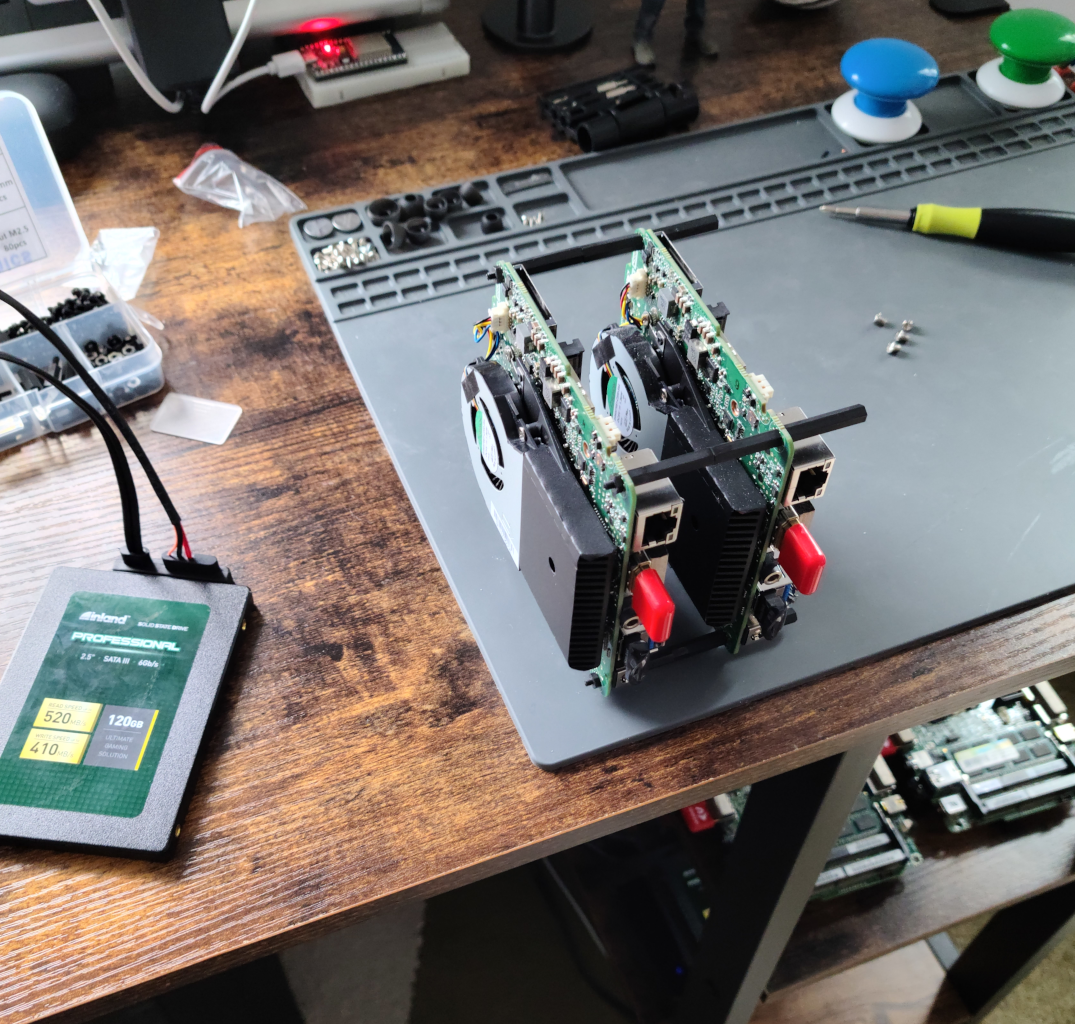
In the end after some gentle persuasiona and drilling, ended up with this pattern:
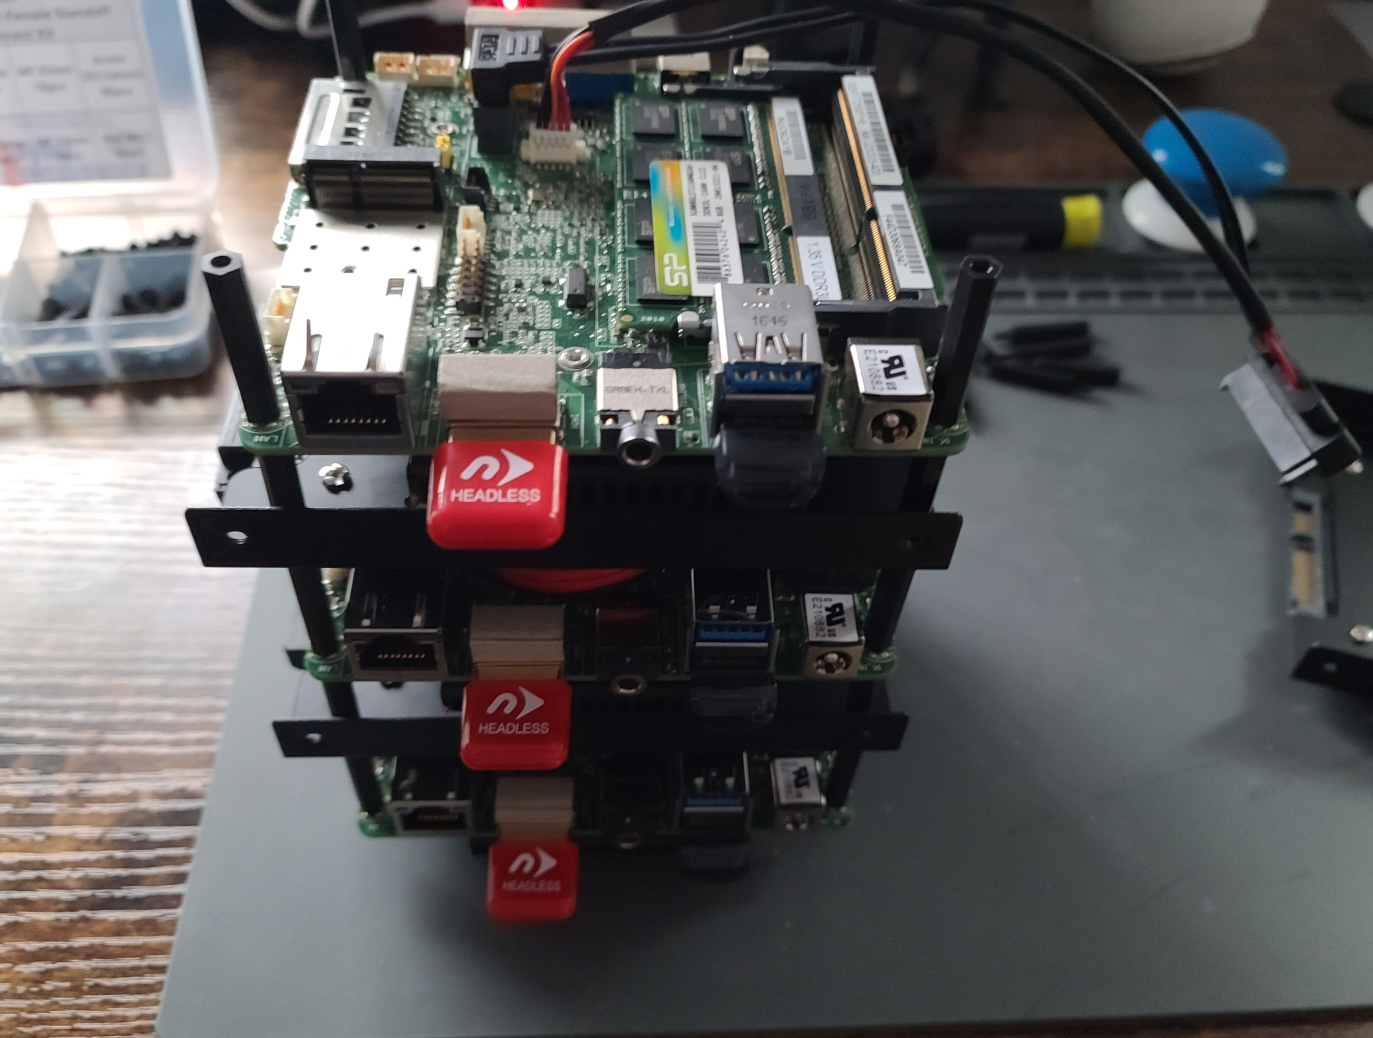
The 3.5 inch hard drive brackets between each NUC allowed for just enough space to mount a disk while still leaving adequate room for airflow, cabling, etc. End Result:
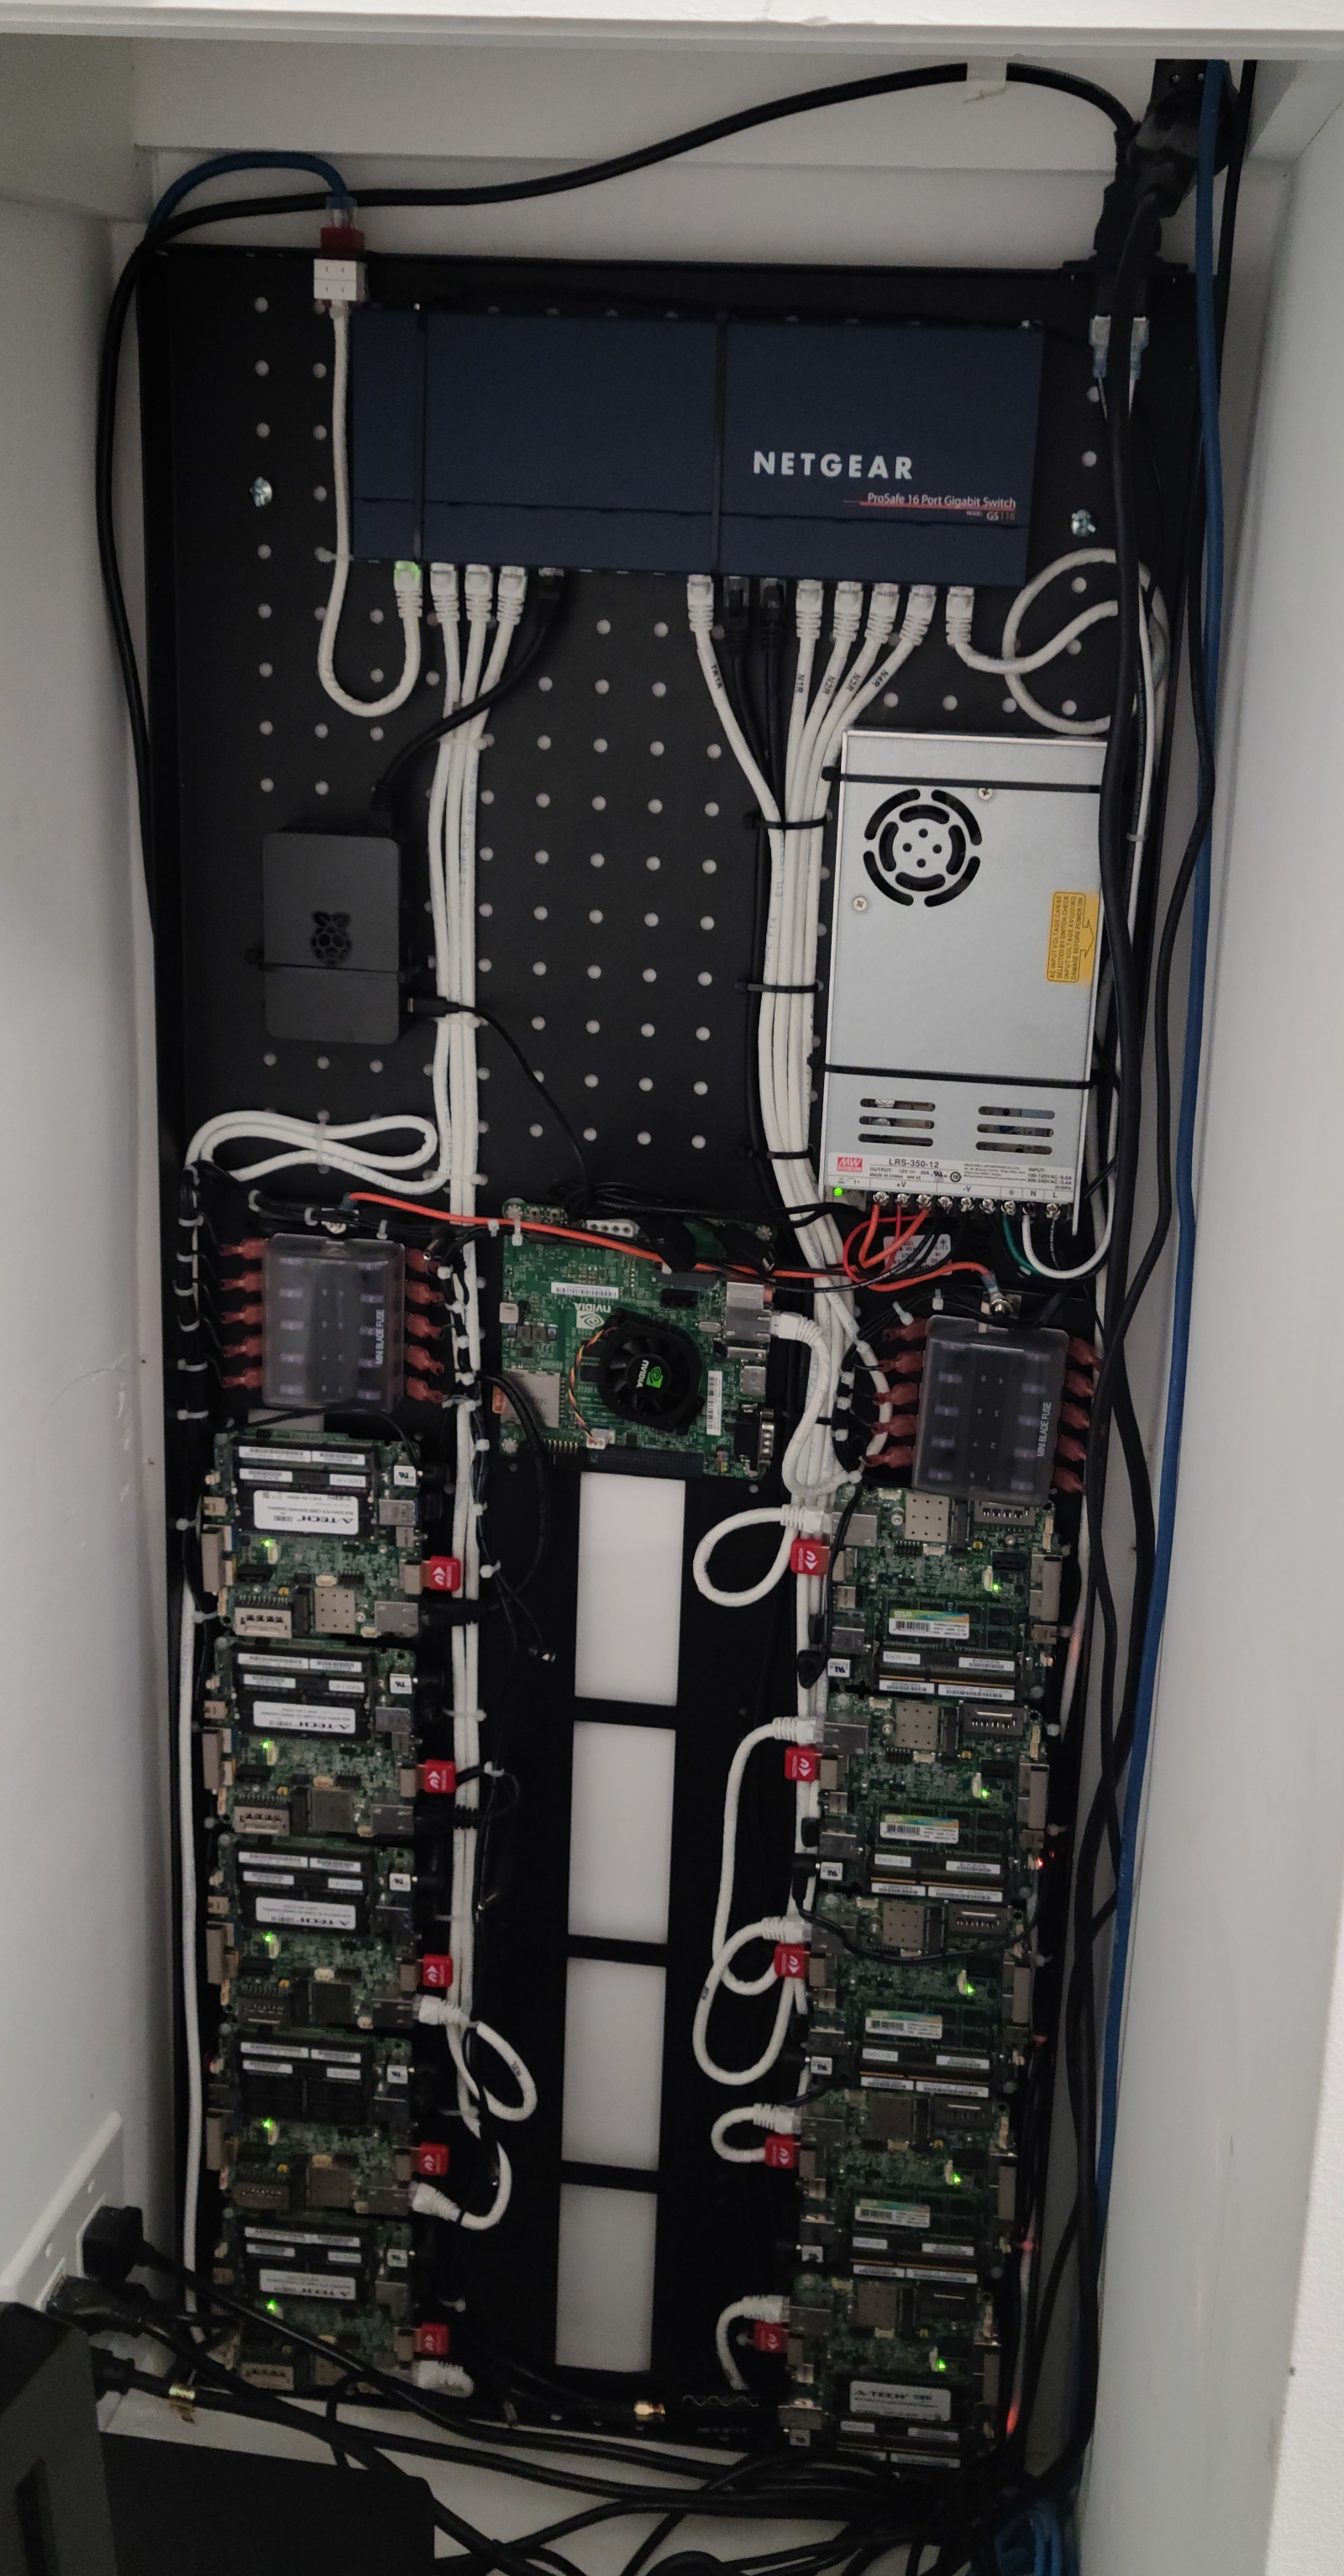
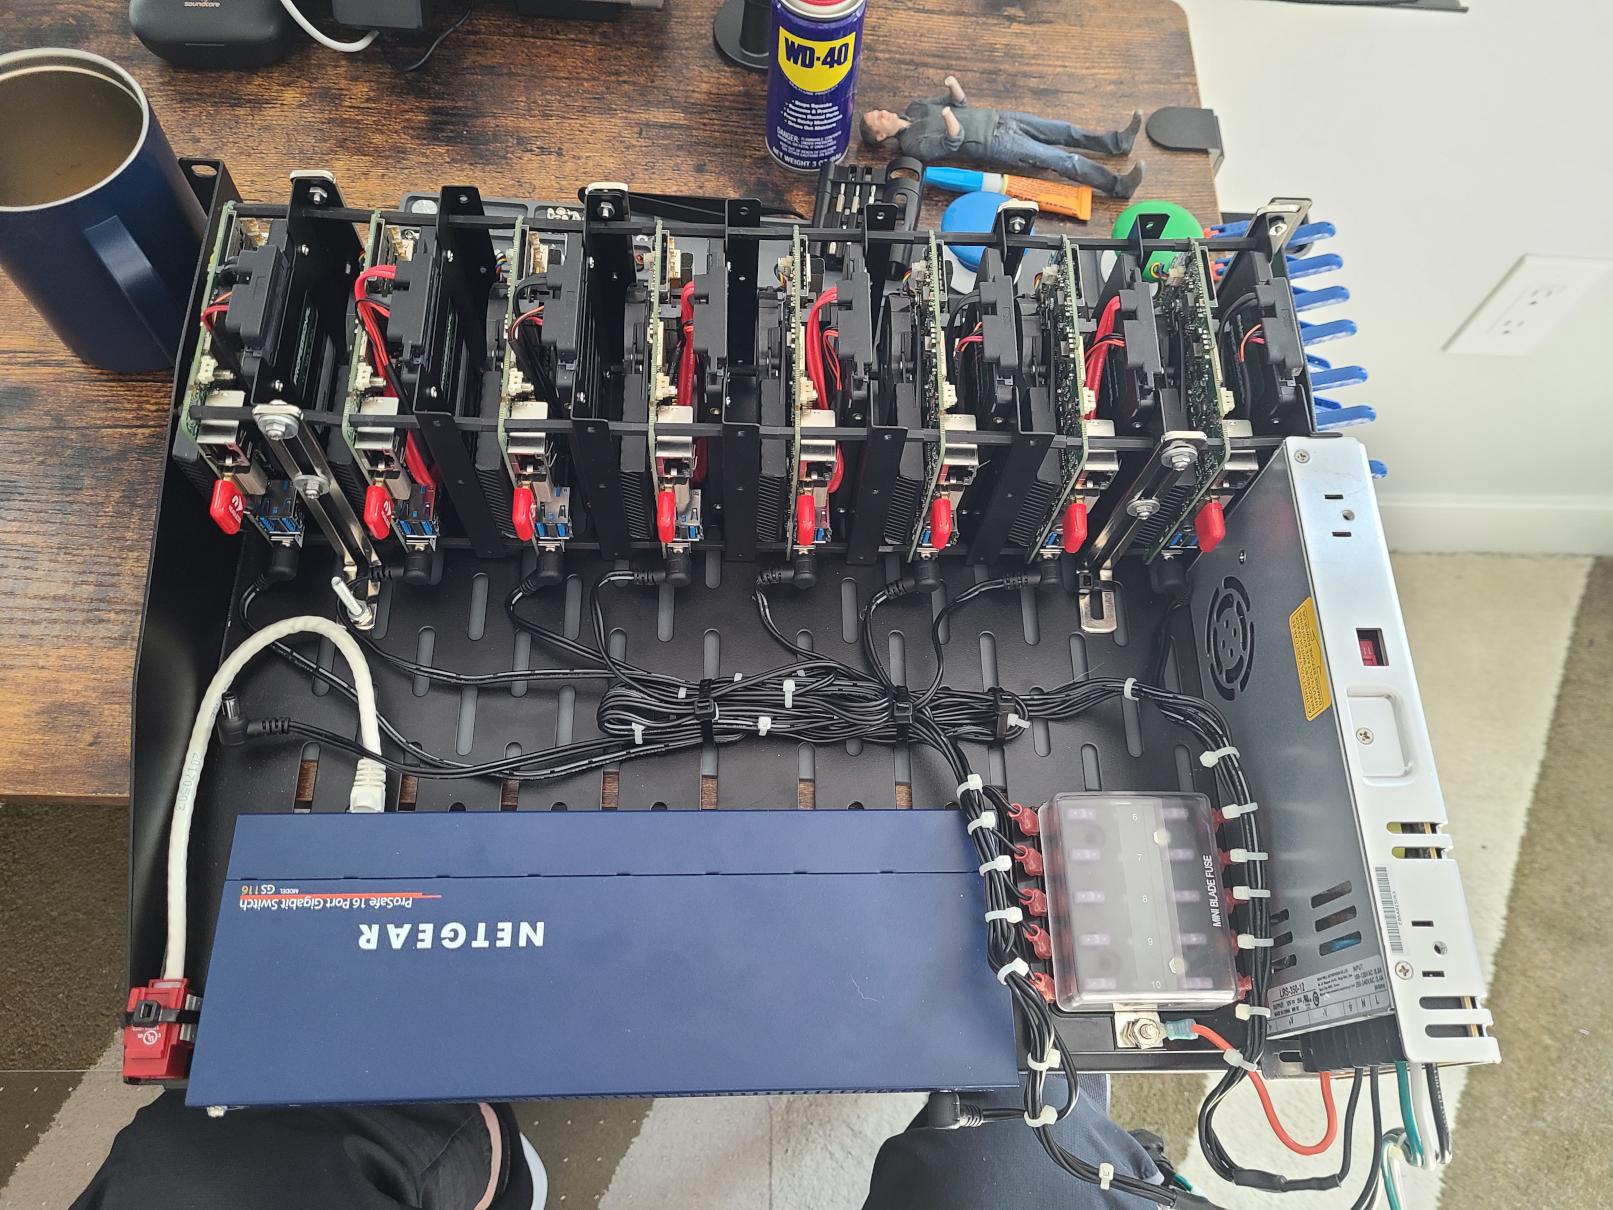
In the end, I did refactor this slightly to maximize the number to 8x NUCs on my 2U shelf. For this first pass, I stuck with the cheap 16 port switch too. I’ll likely be swapping that out for something more capable in the future. Not picture, the KVM hardware, which fits snugly on top of the switch, I added some risers to this too, to allow for some airflow as these things can get toasty. The stack itself is affized using some simple L- brackets
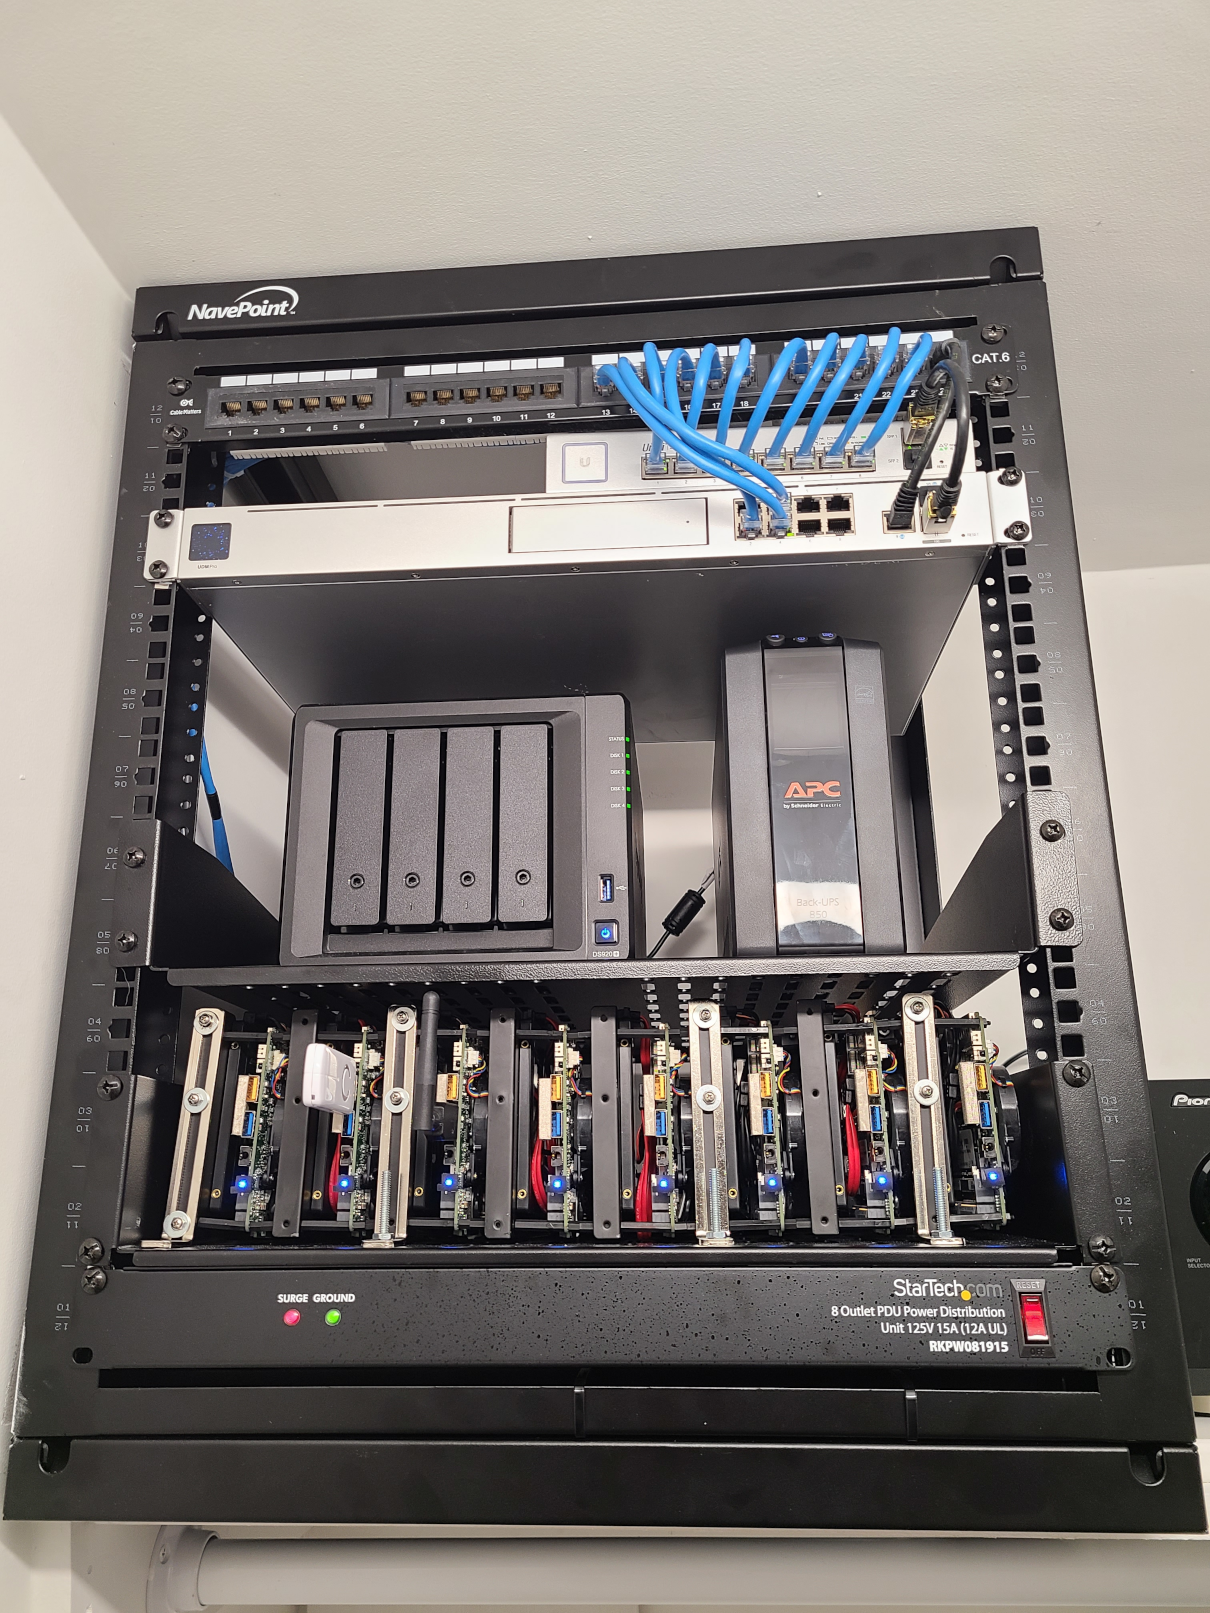
…and here we have it mounted in the 12U rack in my closet. It has been in place for a few months now with no issues so far. Some likely tweaks I will make is transition the power delivery to 2x passively cooled units to add some redundancy and drop the noise of this power supply.
Final Note
In a follow-up post, I’ll go into the method I used to manage this cluster, building on top of some very recent work by the fantastic k8s@home community!