
I recently did some playing around with tailscale which is a fancy wrapper for wireguard. It takes some of the headaches away from wireguard and provides a clean way to manage instances registered with a wireguard network. It can definitely handle alot more complex things than the scope of my playground. I entirely leveraged their currently free-tier account and wanted to attempt a simple setup of a relay to route subnets to a tailscale network as needed. At the moment, I’m using basic EC2 instances to prove out the concept but there are definitely more interesting potential methods in the wild. The goal was to allow me to provision a VPC in some region and securely access some resources under a private subnet with having to get crazy with a convoluted VPN setup. Tailscale uses Wireguard as its underlying VPN technology and you haven’t use it yet, its well worth diving into. Its extremely simple to get a wireguard VPN up and running, relying on the exchange of public keys between the intended servers, similar to SSH keys. Wireguard has clients for all the things and since 5.6 its protocol has been incorporated in the linux kernel. One pain point with ‘vanilla’ wireguard is management of all that. There are also lots of tools in the wild to let you manage these things in a clean way. I threw together a basic demo here that will demonstrate leveraging a relay.
This repository uses a devcontainer and as a result works best via VSCode with the Remote - Containers extension installed. The devcontainer is a simple Dockerfile tracked in the rewpo under .devcontainer/Dockerfile thats based on alpine and contains all the dependencies you will need. the README covers the meat of it but once set up with the required environment variables it will let you:
- Provision custom tailscale-relay AMIs in AWS via Packer
- Provision a VPC with a public subnet for IGW and NAT routing for any private subnets to reach the world.
- one
t2.nanoinstance in the private subnet to act as our relay - one
t2.microinstance as a demonstration of functionality
The AWS resources after AMI creation are all provisioned using Terraform and all operations are performed using go-task which abstracts away some of the complexity. You can examine the tasks under ./.taskfiles. You can see all available tasks by simply running task.
Packer
The tailscale-relay custom AMI is defined under ./packer/tailscale-relay.json.pkr.hcl.
Packer basically spins up a t2.nano instance in the target region using the latest public ubuntu 20.04 image, runs a script that adds the tailscale repos and installs the tailscale package, does some cleanup and bundles the resulting instances disk up as a custom AMI. It tags these images and makes them ready for use by our terraform. Obviously, in a production scenario, there would be more care around securing the resulting image and its supply chain but for now this is fine for testing.
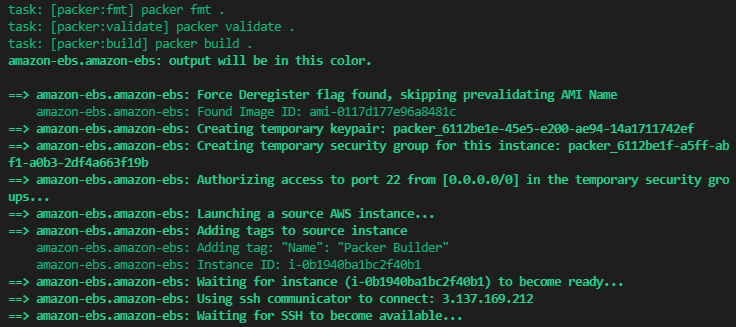
The packer build process running
You will need to set up a tailscale account and add a new ephemeral key for use. As a note, these keys do expire. Probably good thing for a demo. You can use a reusable key but this would be dangerous to accidentally leave in the wild and active.
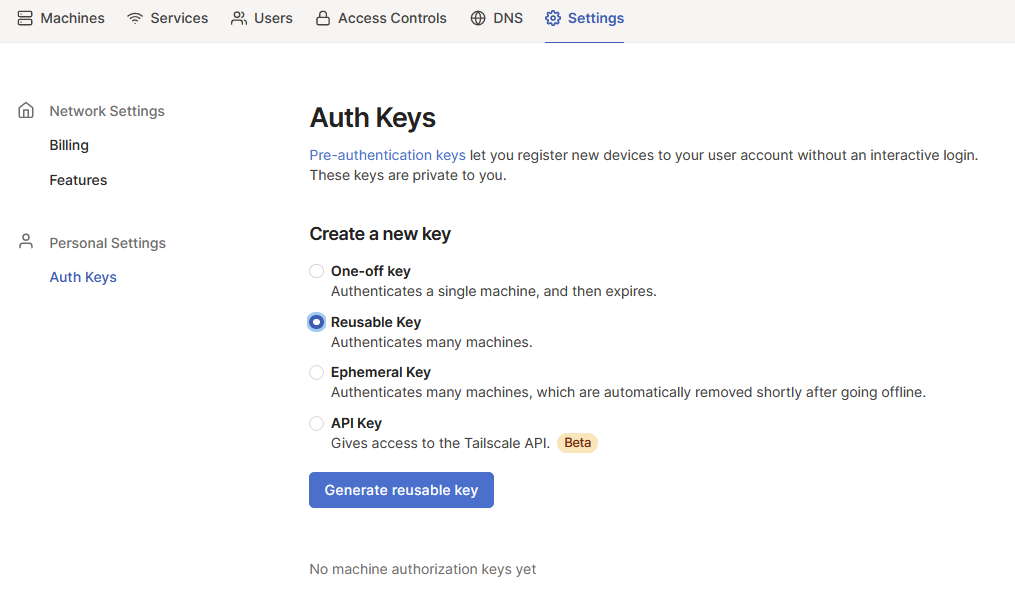
Setting up our tailscale key
Once you have this and define it in the repo’s .env file along with the AWS credentials, you’re ready to test this out. You can simply run task terraform:apply. That will handle the initialization and terraform apply. I’m leveraging some publically available terraform modules and providers, which you can review under ./terraform/infrastructure. Just for simplicities sake, tailscale_relay.tf contains the terraform definitions that provision our SSH key, VPC, subnets and tailscale EC2 instance. I’ve kept some variables statically defined in the locals {} block of this file again for simplicity. ./some_instance.tf just separates out the demo instance resource definition. In this case, I provision a single ts.micro instance off of the latest ubuntu 20.04 public image.
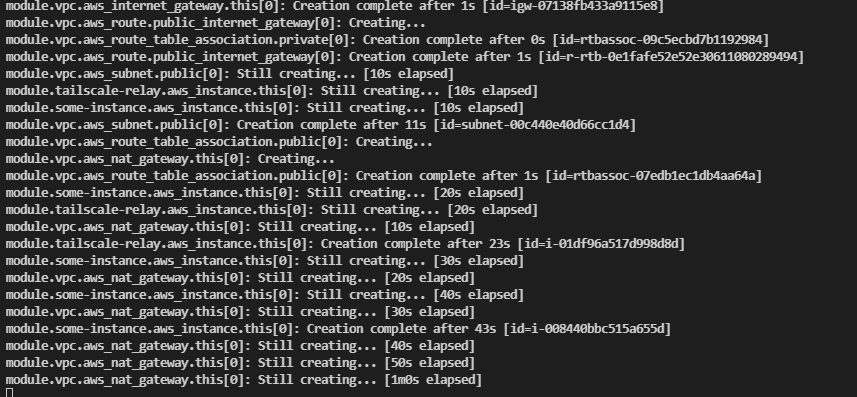
Terraform Apply
Once this apply completes, assuming your tailscale API key is correct and everything succeeded, you should see some resources in AWS and a new node in you tailscale admin console.
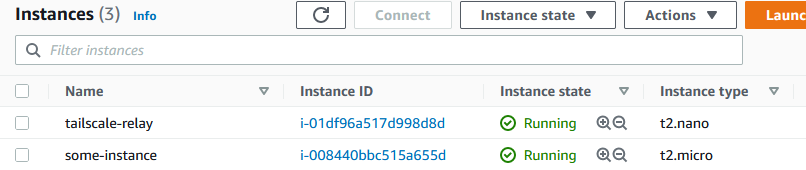
AWS Instances

Tailscale Machines
In my case, the tailscale relay is machine ip-10.0.2.219, note the highlighted subnets(!) under the node. We need to approve this node to allow it to advertise routes to our subnets to the rest of the machines in our tailscale network. Also, make sure to install the tailscale client on your local machine too and log in, you can see my workstation in the machine list. The clients are all available for download on their site.
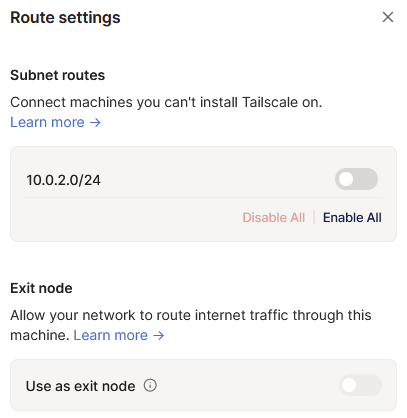
Route approval
There is a means to do this via the tailscale automatically but for now, I manually enable it. Note that you can aslo set up a relay node to route internet traffic through it. Probably a useful function to play with later on!
The demo uses the default ubuntu username. One important and useful note, the terraform state is stored locally under ./terraform/infrastructure/<ENV>/terraform.tfstate.d/terraform.tfstate. If you’ve used terraform before, you know that this contains sensitive things, which is why I .gitignore it. I also use some useful go-tasks vars to interrogate this data for useful things. If you look in .taskfiles/ssh.yml, you can see some of this. the var SSH_PRIVATE_KEY is set up to parse the state file with jq and extract the private key from the private_key_pem resource. The ssh:export-privatekey task in the same file outputs this key ~/.ssh/id_rsa. The public key for this resource was used in the key pair defined as authorized for our new EC2 instances. As a result, After you run task ssh:export-privatekey, you should be able to ssh to the private ip address of the other instance you deployed in AWS, in my case 10.0.2.165.

Working SSH!
When you’re finished, a simple task terraform:destroy run to completion should clean up all resources.
Note: It will not clean up the packer images we initially created so make sure to clean those up and their resulting disk snapshots to prevent incurring charges.